


Tips for Turning High Polygon Cinema Ready 3D Models Into Beautiful, Usable Game Art
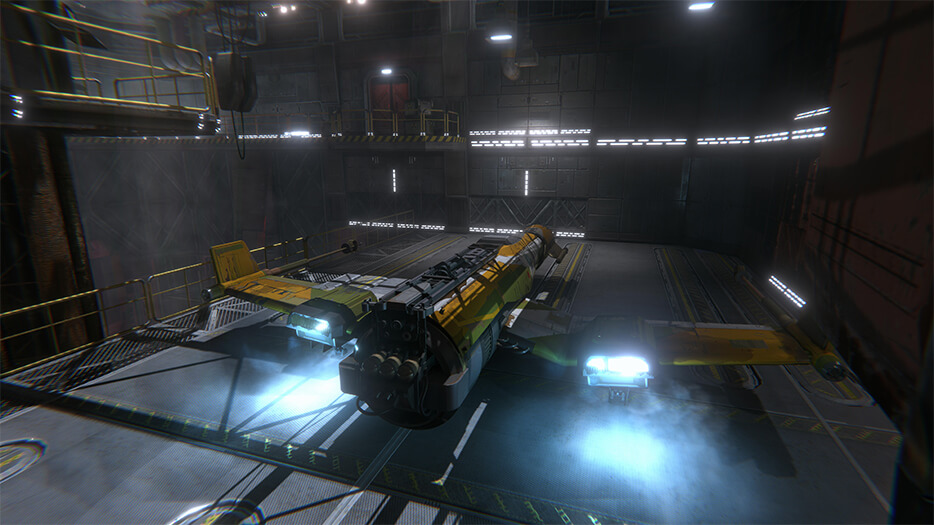
It’s always nice to work with high quality assets provided by clients, but for game development on mobile devices, we just don’t have the luxury to use 4K textures and high poly models. Simply put, if we tried to use them, performance would drop like a ton of bricks on mobile devices. Perhaps down the road with new phones and 5G networks we might, but for current gen phones we need to stick to more traditional game development methods. In this blog, I go over some of the tricks and processes we used to convert production-ready, high-quality 3D ships from the television series for use in our mobile game, Star Wars: Resistance Racer.
The models sent to us by Lucas Films consisted of UDIM UVs, and generally they were associated with several 4K textures. Furthermore, each ship model contained over several million polygons. The agreed engine to be used for our game was Unity 2018.3.5. However, its support for UDIM UV placement is not available yet.
This is understandable considering they were used in film production and the highest quality texture rendering was to be expected. Using these models directly in Unity, however, would have been crippling to performance, and the texture placement would have been all out of whack. So, how do we use these awesome models in our game?
The solution was a combination of building low poly base meshes, or very simple geometry that captures the 3D form of the ships, and using texture baking techniques, which I will expand on momentarily, to capture as much detail from the client’s source models as possible.
We’ve always had better results with texture bakes on models that don’t use UDIMs. So, before I could texture bake, I needed to prep the source models.
The client provided various 4K texture files associated with the X-Wing. Dozens of 4K textures made up each ship part, which relied on the UDIM UV placement to display correctly. I started manipulating those texture files in Photoshop and combining them into one texture. This new texture would also match up with the sections of the ship on which I would reorganize the UVs.

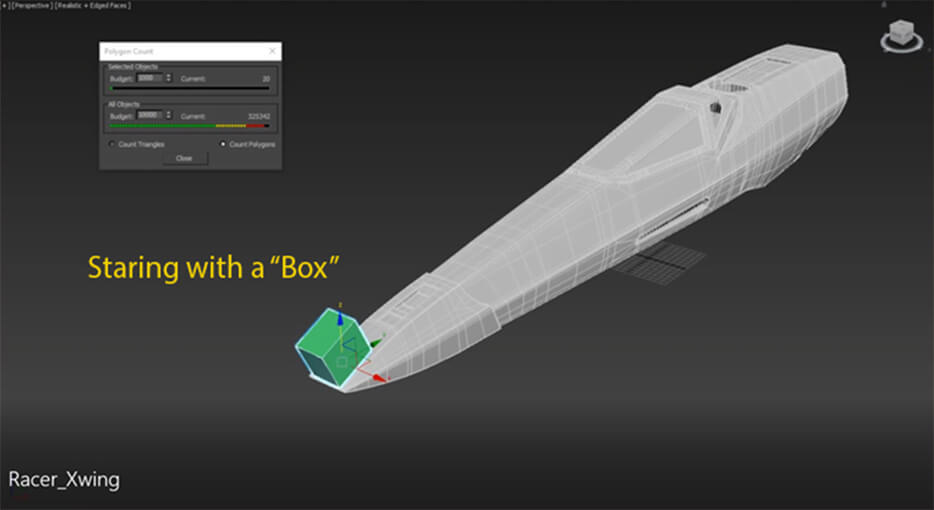
OK! Now the real work begins. In Autodesk 3DS MAX, I import the client’s high poly model into a scene, in this case Poe’s X-Wing! I’m only using the high poly model as a guide while I create base meshes that conform to the parts of the ship we needed.
3D programs all offer some form of 3D model optimizing tools. These can take high poly models and merge polygons together, usually reducing the number of them. Why not just use some mesh optimizing tools to reduce the source models in Max? Short answer to that: the number of polys that are intersecting on the source’s model would have produced undesirable results all over the place, which left us no choice but to manually delete polys anyway. In the end, it’s faster to build a low poly base mesh and have more control over the topology and UVs.
Starting with a “box” converted to editable poly and subdivided, I started pushing and pulling vertices around, adding edge loops where applicable, and building up to what will be the nose, cockpit, and back engines.
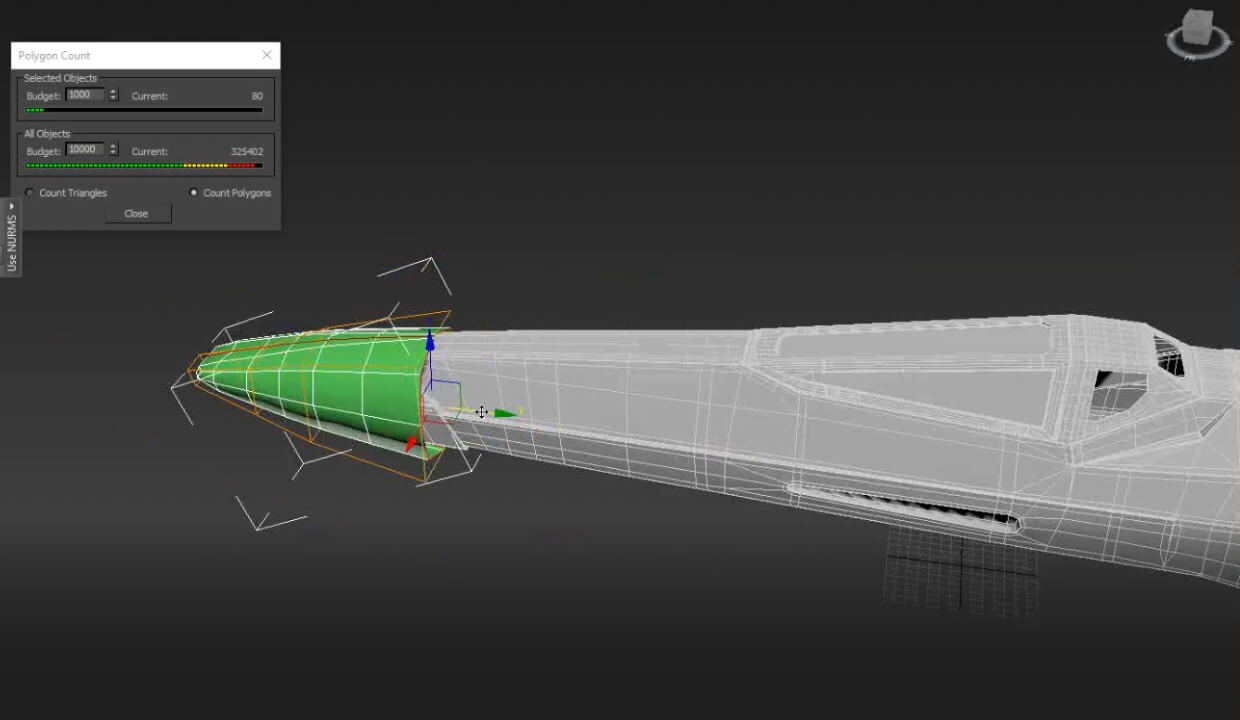
I’m constantly switching to an invisible/x-ray mode to help follow the contour/form and shape of the source X-Wing on which I’m working. Each new poly I add is carefully evaluated and determined if it’s needed to match the form of the iconic design of the X-Wing. The goal here is to create a low poly model that captures the shape as much as possible, while keeping in mind that my final poly count should stay well under 10,000.
After attaching the parts together, I’m ready to UV unwrap each base mesh part into UV islands. When we deal with UVs in 3D, we generally perceive them as image files that will wrap around the model. Imagine peeling an orange -- each part you peel off could be considered a UV island, and if you were to stitch those orange peels back together, it would resemble the orange again.


With the UVs good to go, I do a quick “Checkerboard” material test to make sure the UVs are as tight and clean as possible. This is always a good step to take to evaluate how well placed the UVs are. If the pattern appears stretched or distorted, it’s a sign that the UVs are not set correctly.
I import the low poly model back into the high poly X-Wing scene in MAYA. I carefully place it, so the two models match up as close as possible. With that done, I’m ready to start plugging in the baking settings.
I set the oven to 375°, KIDDING!! Lol. No, seriously, texture baking has been around for a long time, but has not always been simple to achieve. Over the years better algorithms have been incorporated into software such as Maya, 3DSMAX, Zbrush, and let’s not forget the new kid on the block… Substance Painter; all have facilitated this important but not always easy-to-achieve technique.
Basically, the process involves “projecting” the high poly model’s intricate details onto our low poly models UVs and ultimately generating a new texture. If all goes well, we have a brand new 2K texture that comprises all of the ship parts. As a bonus, the baking produces a set of PBR shader-ready textures: Diffuse, Specular/Metal/Roughness, and Normal Maps. These extra textures are crucial to achieving a convincing high poly look that is displayed onto our low poly model in Unity.
Baking can take anywhere from a few minutes to a few hours, depending on the resolution selected. In our case, since we are targeting mobile devices, we choose our baking outputs to be no larger than 2046x2046. This allowed for great texture quality, with bake times taking less than a half hour for each ship.

With the textures freshly baked, I quickly open it in Photoshop and brighten and tweak them just a little, which removes any blemishes or spots, if any, where the baking was not able to capture too well.

I render out a few angles to double check that the textures look good, and lastly, I export the low poly model with material as an FBX into Unity. The final poly count for Poe’s X-wing model was only 4092 polys, compared to over a millionin the source model. Furthermore, optimizing ship models and assets had allowed us to implement more particle effects, and it kept performance running very well on even older mobile devices.

In writing these closing remarks, I remember playing countless hours of the original X-Wing games on the PC/DOS. Back then, the poly count and texture fidelity on the models was extremely low, which left the player to fill in the lack of details with one’s imagination. Today’s mobile gamers have much higher expectations.
The average mobile device does have graphics processing capabilities far beyond those on which I started playing games. But, limits still exist and will continue to exist for the next little while.
Low poly modeling, combined with the texture baking of the high-fidelity source model, worked out wonderfully for us. Plus, the client was very happy with how well we were able to replicate the source models, since the need to produce great-looking, yet high-performing, 3D assets will still be essential in mobile game development moving forward. These processes examined here are essential when source models are provided by the client.
Let us know if you have any questions on our process -- we’re happy to help!